Introduction
Achieving a perfectly level pool table is essential for accurate ball roll, consistent cue response, and long‑term equipment durability. This guide will teach the reader how to assess, adjust, and verify table levelness using practical techniques and affordable tools. By following each step, one can transform a wobbling table into a professional‑grade playing surface without hiring a specialist.
The process combines basic measurement principles with simple mechanical adjustments. Readers will gain confidence in using a precision bubble level, rubber shims, and adjustable leg risers. The resulting table will provide smoother gameplay and reduce wear on cushions and pockets.
What You'll Need
- GEONASSUR Bubble Level – aluminium case, 60 mm diameter, 4.6/5 rating, $14.99.
- Rubber shims for fine height adjustments – either Haull Pool Table Leg Shims (50 pcs, $12.59, 4.6/5) or Youven Pool Table Shims (30 pcs, $11.99, 4.5/5).
- Adjustable metal leg levelers for larger corrections – LVOERTUIG Table Leg Levelers (4 pcs, $28.63, 4.4/5) or Saycker Pool Table Levelers (4 pcs, $26.99, 4.6/5).
- Phillips screwdriver (standard household tool).
- Measuring tape or ruler.
- Soft cloth for cleaning table legs.
Step 1: Assess the Current Level
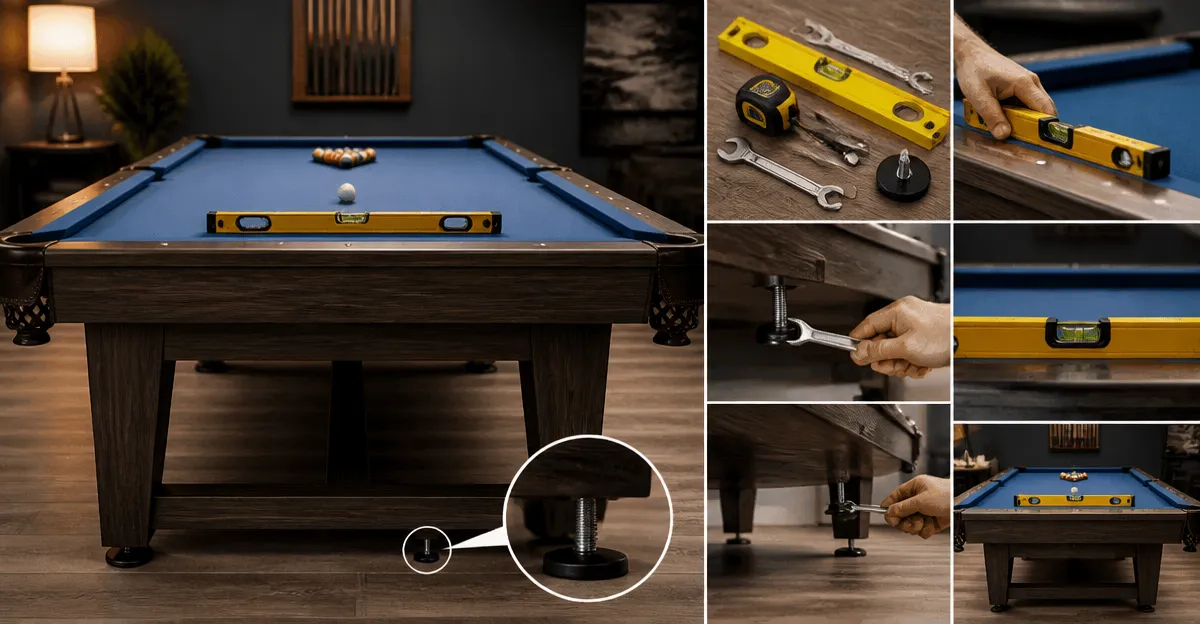
Begin by clearing the playing surface of all balls, cues, and accessories. A clean slate eliminates interference when reading the level indicator. Place the GEONASSUR Bubble Level on the center of the slate, aligning the long side with the length of the table. Observe the bubble; if it rests off‑center, the table is not level.
Record the deviation in both the lengthwise and widthwise directions. Typical commercial tables require less than 0.25 inch of variation across the surface. Note the exact leg or corner that appears lower, as this will guide subsequent adjustments.
The bubble level’s 15′/2 mm sensitivity (0.25°) provides sufficient precision for most home environments. Its aluminium case resists scratches and offers a clear, durable view of the bubble, making it superior to inexpensive plastic alternatives.
Step 2: Gather and Prepare Tools
Before making any adjustments, ensure all recommended tools are within reach. Lay the rubber shims and metal levelers on a nearby table. Use the soft cloth to wipe dust from each leg, as debris can impede smooth movement of adjustment hardware.
If the table rests on carpet, consider placing a thin plywood sheet beneath the levelers to distribute weight evenly. This precaution prevents localized pressure points that could damage the floor or the table base.
Having the screwdriver ready will allow immediate tightening of bolts when installing metal levelers, reducing the time the table remains unsupported.
Step 3: Position the Bubble Level for Precise Measurements
Place the GEONASSUR Bubble Level at four key locations: the front left corner, front right corner, rear left corner, and rear right corner. Record the bubble position at each point. This four‑point method reveals whether the table is tilted along one axis, both axes, or is uneven due to warped legs.
When the bubble is centered, the table is level at that point. If the bubble deviates toward one side, the corresponding leg is lower. The level’s 0.32 inch bubble movement per degree tilt helps translate visual offset into a measurable height difference.
Document the measurements in a simple table format. This record will serve as a reference during the adjustment phase and will help verify that each correction moves the bubble toward the center.
Step 4: Adjust Table Legs Using Shims or Levelers
If the deviation is less than 0.125 inch, rubber shims provide a quick fix. Insert a Haull Pool Table Leg Shim or Youven Pool Table Shim under the low leg. Each shim is 0.06 inch thick; stacking two yields 0.12 inch. The rubber material resists compression, unlike cardboard or foam, ensuring a stable, non‑slipping support.
For larger discrepancies (greater than 0.125 inch) or when a more permanent solution is desired, install adjustable metal leg levelers. The LVOERTUIG Table Leg Levelers feature a threaded bolt that can be turned to raise or lower the leg in fine increments. Their metal construction offers durability and resistance to rust, making them suitable for high‑traffic game rooms.
Alternatively, the Saycker Pool Table Levelers provide a height range from 1.69 to 2.95 inches, adjustable by rotating the metal plate. The included screws secure the leveler to the leg, preventing accidental movement during play. Choose the product that best matches the required height adjustment and the aesthetic preference of the room.
Step 5: Verify Level After Each Adjustment
After inserting a shim or tightening a leveler, place the bubble level back on the same corner and observe the bubble. Small incremental changes prevent overshooting the target level. Continue this cycle—adjust, measure, repeat—until the bubble centers at all four corners.
When the table appears level, perform a dynamic test: roll a cue ball from one end of the table to the opposite end. The ball should travel in a straight line without veering left or right. If it drifts, re‑measure the corners and make minor tweaks.
Finally, tighten all leg bolts securely, but avoid over‑torquing, which could strip the threads or crack the leg base. A snug fit ensures the table remains stable during vigorous play.
Tips & Pro Tips
- Work on a dry day; humidity can affect wooden legs and cause slight expansion.
- Use a laser level as an alternative to the bubble level for larger rooms; however, the bubble level remains more affordable and equally accurate for most home setups.
- When using rubber shims, trim excess material with a utility knife to achieve a flush fit against the floor.
- Periodically re‑check level after moving heavy furniture nearby, as floor vibrations can shift the table over time.
- If the floor is severely uneven, consider installing a plywood sub‑base before applying shims or levelers.
Troubleshooting
| Problem | Possible Cause | Solution |
|---|---|---|
| Bubble remains off‑center after adjustments | Shims slipped or leveler bolts not fully tightened | Re‑seat shims, ensure they are flat against the floor, and tighten bolts with a screwdriver. |
| Table wobbles when striking a ball | Uneven weight distribution on legs | Place a small washer under the leg that bears the most weight, then re‑measure. |
| Rubber shims compress over time | Excessive load from a heavy table | Upgrade to metal levelers such as Saycker Pool Table Levelers for greater support. |
Conclusion
By following the systematic approach outlined above, one can achieve a level pool table that delivers consistent ball roll and extends the lifespan of the playing surface. The combination of a high‑precision GEONASSUR Bubble Level, durable rubber shims, and robust metal leg levelers equips the DIY enthusiast with all necessary tools. Regular maintenance and periodic re‑checking will preserve the optimal level for years to come.
Implement these steps, enjoy smoother gameplay, and impress fellow players with a professionally leveled table—all accomplished without professional service.
Products Mentioned in This Guide
Frequently Asked Questions
What tools are essential for leveling a pool table at home?
You need a precision bubble level, rubber shims or leg risers, and a screwdriver or wrench for adjusting the legs.
How can I tell if my pool table is out of level?
Place a bubble level on the playing surface; if the bubble is off-center in any direction, the table is not level.
What is the correct order for adjusting table legs?
Start by loosening all legs, then raise or lower each leg with shims until the level reads centered, and finally retighten the legs.
Can I use any type of shim for fine adjustments?
Rubber shims are recommended because they provide stable, non‑slipping support and prevent damage to the floor.
How often should I re‑check the level of my pool table?
Check the level after moving the table, after major temperature changes, or at least once a year to maintain consistent play.